- What is Midjourney AI?
- How to Use Midjoruney AI?
- How to create Images with Midjourney AI - Step-By-Step Guide
- Step 1: Write a Text Prompt
- Step 2: Enter the Prompt
- Step 3: Wait For the Image To Generate
- Step 4: Use Upscale and Variations
- Step 5: Edit Your Images
- Step 6: Export and Share Image
- Advanced Features For Customize Parameters
- Explore the Discord Community
- Have Fun
We are living in a digital world of images, content, and videos. Many people start and end their day by scrolling through social media. These platforms offer a wide range of images and graphics that attract the audience for revenue. However, creating these images is a task. In this post, we’ll guide you about an AI image generation tool called Midjourney AI for generating stunning images.
Whether you are a graphic designer, digital artist, or any curious person who wants to explore advanced AI technology, you can explore Midjourney AI. This is a perfect platform for turning your imagination into artwork. Sit back, read till the end, and learn how to use Midjourney AI for stunning image generation.
What is Midjourney AI?
Creating images and visuals for digital work has never been easier. But thanks to Midjourney AI, its AI image generation tool helps to create stunning images for artwork, logo creation, and website content. In addition, the usage of this tool is so easy, all you have to add a text prompt and transform your ideas into reality.
Additionally, you can get access to this image generator tool through a chat app called Discord. It uses NLP-friendly models to understand your description and text prompts for visual creation. Whether you want to create 3D high-quality images or fantasy world images. Midjourney AI creates everything you can imagine.
How to Use Midjoruney AI?
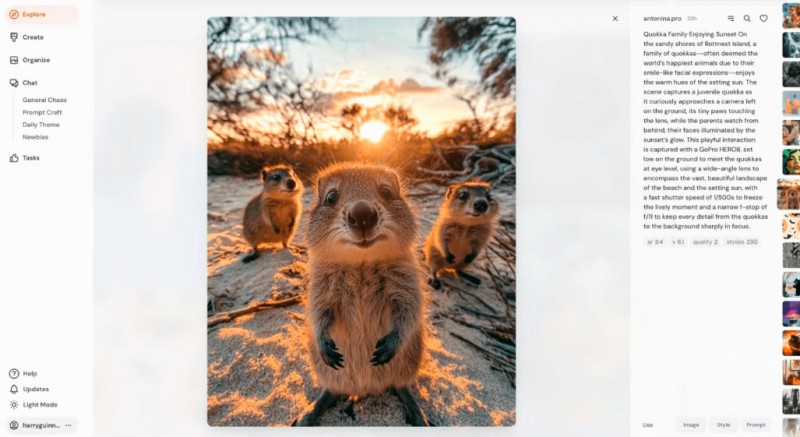
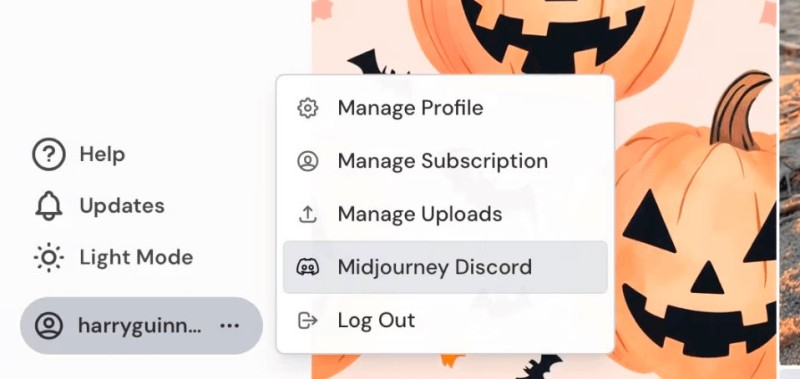
As we have already told you, you can operate Midjourney AI through Discord because it is a community builder AI tool. When you open the Midjourney server, the first thing you’ll see is the latest generated images of the day. You can take inspiration from their prompts while clicking on them.
Search Bar: It has a search bar that helps you to find already generated images that match your idea and theme. Midjourney images are always public unless you get a paid subscription.
Left Sidebar: The left sidebar has various options for creating and organizing images. You can even chat with the Discord community and manage tasks for ranking images.

How to create Images with Midjourney AI - Step-By-Step Guide
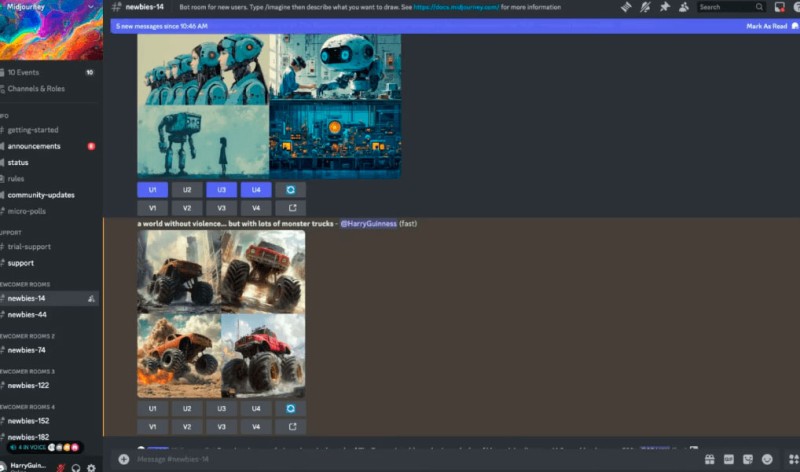
The first thing you need to do is to locate the bot channels. In the Midjournery server, you’ll get multiple channels for image creation, but don’t get confused. Search for #newbies and #general channels; this is the main place where the Midjoruney bot will generate stunning images for you.
After this, explore the menu and settings for how to write a proper command for image generation. You can select image resolution, number of images, prompt style, and other features like upscale or variations.

Step 1: Write a Text Prompt
For a realistic image, you need to provide a proper prompt to a Midjourney bot. Text, prompt, or command is basically a description of what you want to generate.
- For Example: /imagine a fantasy world of flying cars and neon-lighting sky
- Pro Tip: Make sure to be specific about your idea while writing a prompt. For example, add a proper description of color, theme, light, and background.
- Reference Image: You can even upload a reference image to create your idea artwork easily.
Step 2: Enter the Prompt
Once you are done writing a prompt, enter it into a designed bot channel. All you have to do is type /imagine using the following description and then wait for the result.
Step 3: Wait For the Image To Generate
After entering your prompts, you will have to wait for 30 seconds or a few minutes to generate your image. Moreover, at the end, you will get four images in grid format. But these are not the final results; you can edit them further.
Step 4: Use Upscale and Variations
After generating the image, you will get an option for upscaling and a variation option for your images.
- Upscale: This is used to generate high-resolution and sharper images.
- Variations: This option gives you different takes on the same concept.
Step 5: Edit Your Images
In the end, you can edit your images with a built-in editor. It will provide multiple editing options like crop, zoom, colors, and lighting adjustments. But for more advanced editing, you can use software like Photoshop and GIMP.
If you don’t find any editing option, click on More Options and get all the editing options easily.
Once you are done with image creation, you can simply download it by clicking on it in full size. You can easily export it to your device. Moreover, after exporting, you can use these images in your design projects or upload them on your social media platform easily.
Advanced Features For Customize Parameters
Midjourney also offers a few parameters to customize your image. It’s like adding key details to customize ratio, randomness, and style. Moreover, you can avail of these options by clicking the options icon in a prompt bar.
- Aspect Ratio: You can change the shape and proportion of the image. For E.g., - -ar16:9 creates a widescreen image, while - -ar2:2 is in square format.
- Quality: You can take full control of creating high-quality images. But this process takes a little longer. For example, q2 produces a high-quality image.
- Style: The user can get multiple versions of the same concept.
Explore the Discord Community
After learning the uses of Midjourney AI, you can explore the community for different uses. Midjourney AI is designed to build a community through image generation. If you are stuck somewhere and don’t know how to transform your idea into reality. You can explore others' work for inspiration. Moreover, you can explore the Chat and Tasks sections for inspiration. Lastly, you can even like or vote for images for Midjourney improvement.

Have Fun
Midjourney is a fun tool. We hope AIChief explained all the steps for using it easily. Make sure to have fun with this tool and turn your inspiration into reality.
 Editorial staff

 Editorial staff


